Category: Home Safety

  • Holiday Cooking Safety: How to Prevent Kitchen Fires

    Holiday Cooking Safety: How to Prevent Kitchen Fires

    The holidays bring family, big meals, and a very busy kitchen. Ovens run for hours, every burner is in use, and the cook is often distracted by guests, kids, and conversation. That combination makes the holiday season one of the most common times of year for kitchen fires.

    The good news is that most cooking fires are preventable. A few simple habits can keep your celebration safe and your kitchen in one piece.

    Why Kitchen Fires Happen During the Holidays

    Most kitchen fires start for the same few reasons:

    • Unattended cooking. Someone steps away “just for a minute” to answer the door or check on guests.
    • Grease and oil. Hot oil can catch fire quickly, especially when frying.
    • Clutter near the stove. Towels, oven mitts, paper packaging, and wooden spoons left too close to a burner.
    • Distractions. More people in the kitchen means more chances for something to be bumped, spilled, or forgotten.

    Knowing these risks makes it much easier to avoid them.

    Stay in the Kitchen While You Cook

    This is the most important rule. When you are frying, grilling, or broiling, stay in the kitchen. If you need to leave, even for a short time, turn off the burner.

    When you are simmering, baking, or roasting, check on the food regularly and use a kitchen timer as a reminder. Phone timers work well because you carry them with you.

    Keep the Cooking Area Clear

    Give your stovetop some breathing room:

    • Keep oven mitts, dish towels, paper towels, food packaging, and recipe cards at least three feet away from the burners.
    • Wipe up grease spills right away so they do not build up on the stovetop.
    • Turn pot handles toward the back of the stove so no one bumps them.
    • Roll up long sleeves and avoid loose clothing that could touch a burner.

    Create a Kid-Free and Pet-Free Zone

    Holiday kitchens are crowded. Set a “safety zone” of about three feet around the stove and oven where kids and pets should not go. Give children a fun job away from the stove, like setting the table or decorating cookies.

    Be Extra Careful with Oil and Frying

    Frying is one of the riskiest kinds of cooking.

    • Heat oil slowly and never leave a pan of oil unattended.
    • If the oil starts to smoke, turn off the heat. Smoke means it is getting too hot.
    • Gently lower food into hot oil to avoid splashing.
    • Keep a lid that fits the pan close by.

    Turkey Fryer Safety

    Deep-fried turkey is popular, but turkey fryers can be dangerous if used incorrectly. If you use one:

    • Use it outdoors only, far away from your house, garage, deck, and trees.
    • Set it on a flat, sturdy surface.
    • Make sure the turkey is completely thawed and dry. Ice and water cause hot oil to bubble over.
    • Do not overfill the pot with oil.
    • Never leave the fryer unattended, and keep kids and pets far away.

    If you are not comfortable with these steps, consider roasting your turkey in the oven instead.

    What to Do If a Grease Fire Starts

    A grease fire can grow quickly. Stay calm and follow these steps:

    1. Never use water. Water makes a grease fire explode and spread.
    2. Turn off the heat if you can do it safely.
    3. Cover the pan with a metal lid or a baking sheet to cut off the oxygen. Leave it covered until it cools.
    4. Small fires can be smothered with baking soda or salt. Do not use flour, which can make the fire worse.
    5. Use a fire extinguisher if the fire is still small and you know how to use it.
    6. Get out and call 911 if the fire grows or you are not sure you can control it. Close the door behind you to help contain the fire.

    For an oven fire, turn off the oven and keep the door closed until the fire goes out.

    Keep Safety Tools Ready

    Before the big day, make sure you have:

    • A fire extinguisher in or near the kitchen. Choose one rated for kitchen use and learn how to use it before you need it.
    • A lid for every pan you plan to use.
    • Working smoke alarms. Test them before the holidays. Our guide on smoke alarms explains where to put them and how to test them.

    Do Not Forget the Rest of the House

    Kitchen safety is only one part of a safe holiday. Candles, holiday lights, and decorations also cause fires every year. See our guide on holiday decorating safety for simple ways to protect your home.

    Quick Holiday Kitchen Checklist

    • Stay in the kitchen while frying, grilling, or broiling.
    • Use timers for baking and roasting.
    • Keep towels, mitts, and packaging away from burners.
    • Turn pot handles toward the back of the stove.
    • Keep kids and pets three feet away from the stove.
    • Use turkey fryers outdoors only, with a fully thawed turkey.
    • Never use water on a grease fire. Cover it with a lid.
    • Keep a fire extinguisher nearby and test your smoke alarms.

    A safe holiday meal is a happy holiday meal. Take a few minutes to prepare, stay alert while you cook, and enjoy the celebration with the people you love.
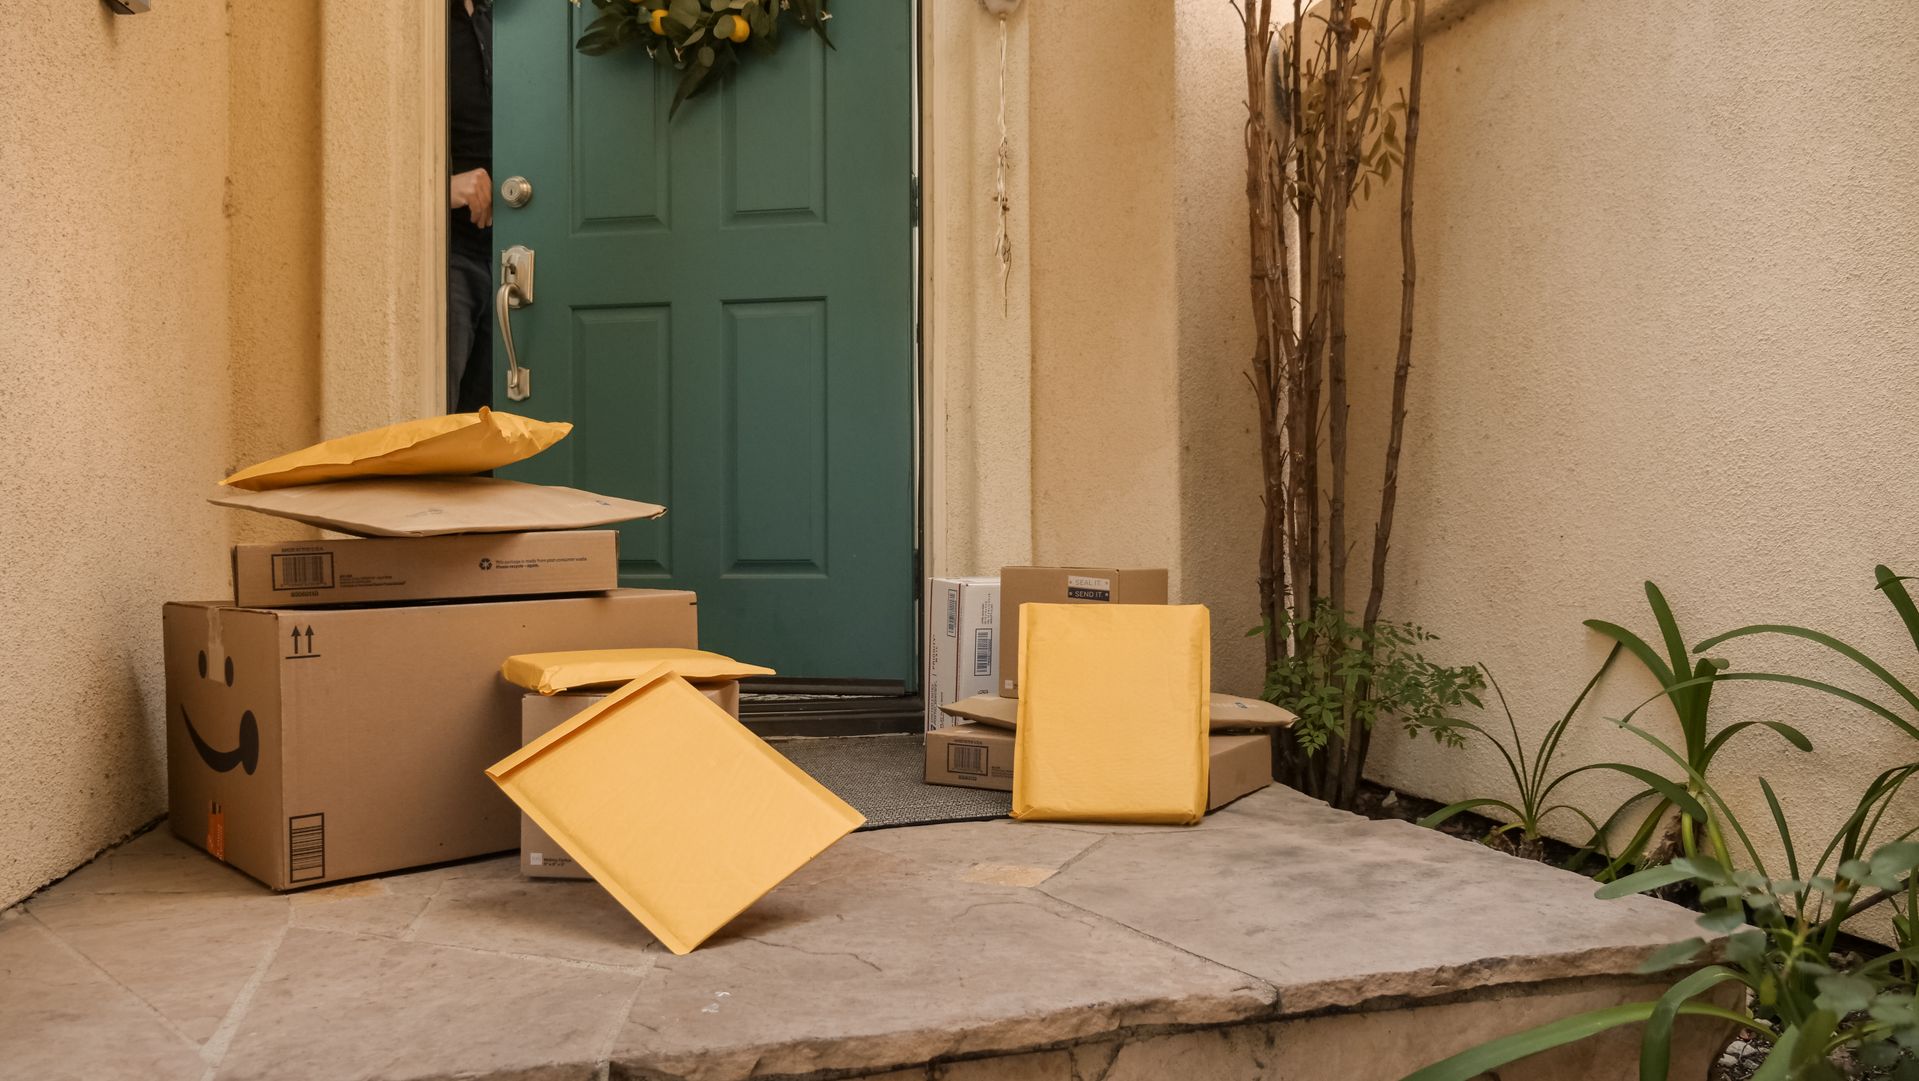

  • How to Protect Your Packages from Porch Pirates This Holiday Season

    How to Protect Your Packages from Porch Pirates This Holiday Season

    The holidays are the busiest time of year for home deliveries, and that makes them the busiest time of year for package thieves too. A box left on a front step for a few hours is an easy target, and most thefts take less than a minute. The good news is that a few simple habits can make your packages much harder to steal.

    Here is how to keep your holiday deliveries safe, and what to do if a package goes missing.

    Why Package Theft Goes Up During the Holidays

    From late November through December, millions of extra packages land on doorsteps every day. Many people are at work or traveling when deliveries arrive, so boxes can sit outside for hours. Thieves know this. Some even follow delivery trucks through neighborhoods and pick up packages right after they are dropped off.

    You cannot control who walks down your street, but you can control how easy your porch looks.

    Track Every Delivery

    The simplest step is also one of the most effective: know when your packages are coming.

    • Turn on delivery alerts in the retailer’s app or by email.
    • Sign up for free tracking services from the major carriers, which can show you packages heading to your address.
    • Check tracking the morning of a delivery so you can plan to be home or ask someone to grab it.

    When you know a box arrived, you can bring it in quickly instead of finding out hours later.

    Choose a Safer Delivery Spot

    Your front step is not the only option. Consider these alternatives:

    • Pickup lockers: Many retailers and carriers offer secure lockers at stores, pharmacies, and gas stations. You get a code and pick up the package when it is convenient.
    • In-store pickup: If you are buying from a store with a location near you, choose pickup instead of delivery.
    • Hold at a carrier location: Most carriers let you have a package held at a local office or partner store.
    • Deliver to work: If your employer allows it, have packages sent to your workplace.
    • A trusted neighbor: If a neighbor is usually home during the day, ask if you can send packages to their address or have them grab yours.

    Leave Clear Delivery Instructions

    Most retailers and carriers let you add delivery instructions. Use them. You can ask the driver to leave packages at a back door, behind a gate, inside a screened porch, or out of view from the street. A box that cannot be seen from the sidewalk is far less likely to be taken.

    Use a Lockable Package Box

    A package delivery box is a sturdy, lockable container that sits on your porch or near your door. The driver drops the package in, and it locks until you open it with a key or code. Pick one that is large enough for your typical deliveries and that can be anchored to the ground or wall so it cannot be carried away.

    Make Your Porch Less Inviting

    Thieves look for easy targets. A few changes can make them move on:

    • Add good lighting. A motion-activated light makes evening thefts riskier.
    • Install a video doorbell or camera. A visible camera is a strong deterrent, and the footage can help if something is stolen.
    • Keep the entry clear. Trim bushes and remove clutter that gives someone cover while they grab a box.
    • Post a simple sign. A small notice that the area is under video surveillance can help discourage thieves.

    If you want to strengthen your entry overall, see our guide on how to make your front door harder to break into.

    Require a Signature for Valuable Items

    For expensive gifts like electronics or jewelry, choose signature confirmation when you check out. The package will not be left unattended, and if no one is home, you can usually pick it up at a nearby location. It may take an extra day, but it is worth it for high-value items.

    Bring Packages Inside Quickly

    Even with every other step in place, the longer a box sits outside, the higher the risk. If you cannot get home, ask a family member, roommate, or neighbor to bring it in. Return the favor when they are away. Neighbors who look out for each other make the whole street safer.

    What to Do If a Package Is Stolen

    If your tracking says “delivered” but the package is not there, stay calm and work through these steps:

    1. Look around first. Check the back door, side entrances, garage, and with your neighbors. Packages are sometimes left in the wrong spot.
    2. Wait a little. Carriers occasionally mark a package as delivered a few hours before it actually arrives.
    3. Contact the seller. Many retailers will replace or refund a stolen package, especially if you report it quickly.
    4. Contact the carrier. File a missing package claim through the carrier’s website.
    5. Report it to local police. Use the non-emergency number or online report form. A police report can help with refunds and insurance.
    6. Check your card benefits. Some credit cards offer purchase protection that covers stolen items.
    7. Save your camera footage. If you have a doorbell camera, download the video and share it with police.

    Watch Out for Fake Delivery Messages

    Scammers love the holiday rush. You may get texts or emails claiming there is a problem with a delivery and asking you to click a link or pay a small fee. These messages are designed to steal your personal or payment information. Always check delivery status through the official app or website, never through a link in a message. Learn more in our guide on how to spot a package delivery scam.

    Quick Checklist

    • Turn on delivery alerts for every order.
    • Use pickup lockers or in-store pickup when you can.
    • Add delivery instructions to keep boxes out of sight.
    • Consider a lockable package box.
    • Add lighting and a visible camera at your entry.
    • Require a signature for valuable items.
    • Bring packages inside as soon as possible.
    • Report any theft to the seller, the carrier, and the police.

    A few small habits can save you money, stress, and a lot of disappointment this holiday season. Plan your deliveries, keep your porch less inviting, and look out for your neighbors. Your gifts should end up under the tree, not in someone else’s car.

  • Holiday Decorating Safety: How to Prevent Fires and Accidents at Home

    Holiday Decorating Safety: How to Prevent Fires and Accidents at Home

    Holiday lights, candles, and a beautiful tree make the home feel warm and festive. But decorations also bring extra electrical cords, open flames, and dry greenery into the house. Every year, fire departments respond to home fires that started with decorations, Christmas trees, or candles. The good news is that most of these accidents are easy to prevent. A few careful habits let you enjoy the season without putting your family or your home at risk.

    Check your lights before you hang them

    Many holiday lights come out of a box once a year, after months in a garage or attic. Before you use them, plug each string in and look closely:

    • Throw away any set with frayed or cracked wires, broken sockets, or loose connections.
    • Replace burned-out bulbs with the same type and wattage the manufacturer recommends.
    • Look for a label from a recognized testing lab, such as UL, ETL, or CSA, when you buy new lights.

    If a string of lights feels hot, smells like burning plastic, or keeps tripping a breaker, don’t use it.

    Use the right lights in the right place

    Lights are made for either indoor use, outdoor use, or both. The package will tell you. Outdoor lights are built to handle rain, snow, and cold. Indoor lights are not. Using indoor lights outside can lead to electrical shocks or fires.

    When you hang lights outside:

    • Use extension cords rated for outdoor use.
    • Plug them into outlets with GFCI protection (the outlets with “test” and “reset” buttons).
    • Use plastic clips or hooks made for holiday lights. Never use nails or staples, since they can damage the wires.

    Don’t overload outlets and cords

    It is tempting to plug everything into one outlet. That is one of the most common causes of electrical fires during the holidays.

    • Follow the package instructions for how many light strings can be connected end to end.
    • Avoid plugging several power strips into each other.
    • Don’t run extension cords under rugs or through doorways, where they can get damaged or overheat.
    • If a cord or plug feels warm, unplug it and spread the load to other outlets.

    Turn decorations off when you sleep or leave

    Lights left on all night or while you are away can overheat without anyone noticing. Make it a habit to turn off all indoor and outdoor decorations before bed and before leaving the house. An inexpensive timer can do this for you automatically.

    Keep your Christmas tree fresh and away from heat

    A dry Christmas tree can catch fire and burn very quickly. If you use a real tree:

    • Choose a fresh tree with green needles that don’t fall off easily.
    • Cut about two inches off the bottom of the trunk before you put it in the stand. This helps it absorb water.
    • Add water to the stand every day. A tree can drink a lot, especially in the first week.
    • Keep the tree at least three feet away from fireplaces, space heaters, radiators, candles, and heat vents.
    • Make sure the tree doesn’t block a door or exit.
    • Remove the tree after the holidays, once it starts to dry out. Don’t leave it in the house or garage.

    If you use an artificial tree, look for one labeled “fire resistant.”

    Be careful with candles

    Candles are beautiful, but they are also open flames. To use them safely:

    • Keep candles at least one foot away from anything that can burn, such as curtains, decorations, paper, and the tree.
    • Place them on sturdy holders that won’t tip over.
    • Never leave a burning candle in an empty room, and blow out all candles before bed.
    • Keep candles out of reach of children and pets.

    Battery-operated flameless candles are a great alternative. They look nice and remove the fire risk completely.

    Watch out for children and pets

    Small ornaments, hooks, and light bulbs can be choking hazards for young children and pets. Place fragile and small decorations high on the tree, and keep cords out of reach so they can’t be chewed or pulled. Some holiday plants can also upset a pet’s stomach, so keep them out of reach.

    Use ladders safely

    Many holiday injuries happen when people fall while hanging lights. Use a sturdy ladder on flat ground, don’t stand on the top step, and keep three points of contact (two hands and a foot, or two feet and a hand). If possible, ask someone to hold the ladder for you.

    Make sure your safety basics are ready

    Before the holiday season, take a few minutes to:

    • Test your smoke alarms and replace weak batteries.
    • Check your carbon monoxide alarms if you use a fireplace or gas appliances.
    • Keep a fire extinguisher in the kitchen and know how to use it.
    • Make sure everyone in the home knows how to get out quickly in an emergency.

    The bottom line

    Holiday decorations should bring joy, not danger. Check your lights, use the right cords and outlets, keep your tree watered and away from heat, and never leave candles or lights on when no one is watching. These simple steps take only a few minutes, and they help keep your home safe and bright all season long.

  • Space Heater Safety: How to Stay Warm Without Starting a Fire

    Space Heater Safety: How to Stay Warm Without Starting a Fire

    When the temperature drops, a space heater can make a cold room comfortable in minutes. But heating equipment is one of the leading causes of home fires in the United States, and many of those fires start the same way: something that can burn was too close to the heater. The good news is that a few simple habits make a big difference.

    Choose a heater with built-in safety features

    If you are buying a new heater, look for these features on the box:

    • Tip-over shutoff, which turns the heater off if it gets knocked over
    • Overheat protection, which shuts it off if the inside gets too hot
    • A safety certification mark from a recognized testing lab, such as UL, ETL, or CSA
    • A cool-touch case, especially if you have kids or pets

    Electric heaters are the simplest choice for most homes. Fuel-burning heaters (kerosene or propane) need extra care, and we cover them below.

    Follow the 3-foot rule

    Keep anything that can burn at least 3 feet (about 1 meter) away from the heater. That includes:

    • Curtains and drapes
    • Beds, blankets, and sofas
    • Clothes, towels, and paper
    • Holiday decorations

    Think of it as a “no-go zone” around the heater. Kids and pets should stay out of it too.

    Plug it straight into the wall

    Space heaters pull a lot of electricity. Plug the heater directly into a wall outlet, never into an extension cord or a power strip, which can overheat. Also:

    • Don’t plug anything else into the same outlet
    • Check the cord before each season and stop using the heater if the cord is cracked, frayed, or damaged
    • Never run the cord under a rug, where heat can build up and damage goes unnoticed
    • If the plug or outlet feels hot, turn the heater off and unplug it

    Put it in the right spot

    Place the heater on a flat, hard, level floor, not on a rug, a table, or furniture. Keep it out of walkways so no one trips over it or the cord. Bathrooms and other damp spaces are a bad idea unless the heater is made for them.

    Never leave it running unattended

    This is the habit that matters most. Turn the heater off and unplug it when you:

    • Leave the room
    • Go to sleep
    • Leave the house

    If you need warmth at night, use extra blankets instead of running a heater next to the bed.

    Don’t use a heater for the wrong job

    A space heater is for warming a room, nothing else. Don’t use it to dry clothes or shoes, warm up bedding, or thaw pipes. And never use your oven or stove to heat your home.

    A special warning about fuel-burning heaters

    Kerosene and propane heaters burn fuel, and anything that burns fuel can produce carbon monoxide (CO), a gas you can’t see or smell. If you use one:

    • Only use a model made for indoor use, and follow the manufacturer’s instructions
    • Give the room the fresh air the instructions call for
    • Use only the right fuel, and refuel outside after the heater has cooled down
    • Have a working CO alarm in your home

    Never bring an outdoor heater, grill, or camp stove inside to warm up, even for a short time.

    Make sure your alarms are ready

    Heating season is the right time to check your safety alarms. Test your smoke alarms and CO alarms, and replace dead batteries. You should have a smoke alarm on every level of your home and near every sleeping area, and a CO alarm outside each sleeping area and on every level.

    If a heater catches fire

    Don’t try to be a hero. Get everyone out, close the door behind you, and call 911 from outside. Don’t go back in for belongings.

    Quick space heater checklist

    • Safety-certified heater with tip-over and overheat shutoff
    • 3 feet of clear space on all sides
    • Plugged directly into a wall outlet
    • Flat, hard floor, away from walkways
    • Off and unplugged when you leave or sleep
    • Smoke and CO alarms tested and working

    A space heater can keep you comfortable all winter. Give it space, plug it in the right way, and never leave it running alone.

  • Carbon Monoxide Alarms: What Every Home Needs to Know

    Carbon Monoxide Alarms: What Every Home Needs to Know

    Carbon monoxide, or CO, is called the “silent killer” for a reason. You cannot see it, smell it, or taste it, and it can build up inside a home without anyone noticing. Every year in the United States, hundreds of people die from accidental carbon monoxide poisoning, and many more end up in the hospital. The good news is that a working CO alarm and a few simple habits protect your family almost completely. Here is what every home needs to know.

    What carbon monoxide is and where it comes from

    Carbon monoxide is a gas made when fuel does not burn completely. Anything in your home that burns fuel can produce it, including:

    • Gas furnaces and boilers
    • Gas water heaters
    • Gas stoves and ovens
    • Fireplaces and wood stoves
    • Gas or kerosene space heaters
    • Cars, trucks, and motorcycles running in an attached garage
    • Portable generators, lawn mowers, and other gas-powered tools

    When these appliances work well and vent properly, they are safe. The danger comes when something goes wrong, like a cracked heat exchanger in a furnace, a blocked chimney, or a generator running in the wrong place.

    Does your home need a CO alarm?

    If your home has any fuel-burning appliance, a fireplace, or an attached garage, the answer is yes. Even an all-electric home can be exposed if a car is left running in an attached garage. Many states and cities now require CO alarms in homes, but you should have them whether the law requires them or not.

    Where to put CO alarms

    Fire safety groups such as the National Fire Protection Association (NFPA) recommend:

    • A CO alarm in a central spot outside each sleeping area, such as the hallway outside the bedrooms
    • A CO alarm on every level of the home, including the basement
    • Extra alarms where your local laws or codes require them

    The most important spot is near the bedrooms. Carbon monoxide is most dangerous at night, when people are asleep and cannot notice the early symptoms.

    Follow the instructions that come with your alarm for height and placement. They will also tell you how far to keep the alarm from fuel-burning appliances, kitchens, and bathrooms to avoid false alarms.

    Smoke alarms and CO alarms are not the same

    A regular smoke alarm does not detect carbon monoxide. You need either a separate CO alarm or a combination smoke and CO alarm. Check the label: a combination alarm will clearly say it detects both smoke and carbon monoxide.

    Know the warning signs of CO poisoning

    Carbon monoxide poisoning can feel like the flu. Common symptoms include:

    • Headache
    • Dizziness or weakness
    • Nausea or vomiting
    • Shortness of breath
    • Confusion or feeling sleepy

    Pay attention to patterns. If everyone at home feels sick at the same time, if the symptoms get better when you leave the house, or if your pets seem sick too, carbon monoxide could be the cause.

    What to do if your CO alarm goes off

    Never ignore a CO alarm, even if no one feels sick.

    • Get everyone, including pets, out of the house and into fresh air right away.
    • Call 911 or your fire department from outside.
    • Do not go back inside until emergency responders say it is safe.

    Opening the windows is not enough. Fresh air may lower the level for a while, but the source of the gas is still there. Let the professionals find it.

    Also learn the difference between the alarm sound and the low-battery or end-of-life chirp. The manual that comes with your alarm explains each sound.

    How to test and maintain CO alarms

    • Test every CO alarm once a month by pressing the test button.
    • Replace the batteries at least once a year if your alarm uses replaceable batteries.
    • If your alarm has a sealed battery and starts chirping, replace the whole alarm.
    • Replace CO alarms when they reach the end of their life. Many models last 5 to 10 years, and some will chirp or show a message when it is time. Check the date and the manufacturer’s instructions.

    Simple habits that prevent CO poisoning

    An alarm is your warning system, but prevention comes first:

    • Have your furnace, water heater, and other fuel-burning appliances checked by a qualified technician every year.
    • Have your chimney and fireplace inspected and cleaned regularly.
    • Never use a gas oven or stove to heat your home.
    • Never run a car in an attached garage, even with the garage door open.
    • Never use a charcoal grill, camp stove, or gas heater meant for outdoor use inside your home, garage, or tent.
    • After a snowstorm, clear snow away from dryer, furnace, and other outside vents.

    Generators: the biggest danger during power outages

    Many CO deaths happen during storms and power outages, when people use portable generators. Follow these rules every time:

    • Never run a generator inside your home, garage, basement, crawl space, or shed, even with the doors open.
    • Keep the generator at least 20 feet away from your home.
    • Point the exhaust away from doors, windows, and vents.

    Quick CO safety checklist

    • A CO alarm outside each sleeping area and on every level
    • Test alarms once a month
    • Replace batteries yearly and alarms when they reach end of life
    • Yearly check-up for fuel-burning appliances
    • Generators outside only, at least 20 feet from the house
    • If the alarm sounds: get out, stay out, and call 911

    Carbon monoxide gives no warning on its own, so your CO alarm has to do it for you. Take a few minutes today to check that every level of your home is covered, especially near the bedrooms.

  • Smoke Alarms: Where to Put Them, How to Test Them, and When to Replace Them

    Smoke Alarms: Where to Put Them, How to Test Them, and When to Replace Them

    Most people have a smoke alarm on the ceiling and never think about it again, until it starts chirping at 3 a.m. But a working smoke alarm is one of the cheapest and simplest ways to protect your family. Fire safety groups report that a large share of home fire deaths happen in homes with no smoke alarms, or with alarms that were not working. The good news is that keeping yours in shape takes only a few minutes a month. Here is where to put them, how to test them, and when to replace them.

    Why smoke alarms matter so much

    Smoke spreads fast, and many home fires start at night while people are asleep. Smoke does not wake you up. In fact, it can make you drowsier. A loud alarm is what gives you the extra minutes you need to get everyone outside.

    Where to put smoke alarms

    The National Fire Protection Association (NFPA) recommends smoke alarms in these places:

    • Inside every bedroom
    • Outside each sleeping area, such as the hallway next to the bedrooms
    • On every level of the home, including the basement
    • On levels with no bedrooms, in the living room or near the stairs that lead to the next level

    Larger homes may need more alarms than this. A few placement tips will also help:

    • Mount alarms high on a wall or on the ceiling, because smoke rises. Follow the instructions that came with the alarm.
    • Keep alarms at least 10 feet away from the stove to cut down on false alarms while cooking.
    • Avoid spots near windows, doors, air vents, and ceiling fans. Moving air can push smoke away from the alarm.
    • Do not put an alarm right outside the shower. Steam can set it off.

    Consider interconnected alarms

    With interconnected alarms, when one alarm sounds, they all sound. That matters more than people think. If a fire starts in the basement, you want to hear it in the upstairs bedroom right away, not when the smoke finally reaches the hallway. Some interconnected alarms are wired in by an electrician, and others are wireless and talk to each other, which makes them easier to add to an older home.

    How to test your smoke alarms

    Test every alarm at least once a month. Just press and hold the test button until it sounds.

    • If the sound is loud and clear, you are done.
    • If it is weak or silent, replace the battery and test again.
    • If it still does not work, replace the alarm.

    Pick an easy date to remember, like the first day of every month, and set a reminder on your phone. If you cannot reach the button, use a sturdy step ladder instead of a wobbly chair, or press the button with the end of a broom handle.

    While someone presses the test button, walk around the house. Make sure the alarm can be heard in every bedroom with the door closed, and make sure everyone at home knows what the sound means.

    Batteries: what to do and what not to do

    The right battery routine depends on the type of alarm you have:

    • Alarms with a sealed 10-year battery do not need battery changes. When one starts chirping to warn of a low battery, replace the whole alarm.
    • Alarms with replaceable batteries need new batteries at least once a year. If one chirps, change the battery right away.
    • Hardwired alarms still have a backup battery for power outages. Change it once a year as well.

    Two habits to avoid: never “borrow” the battery from a smoke alarm for a remote control or a toy, and never take the battery out to stop false alarms while cooking. Instead, press the hush button if your alarm has one, or wave a towel to clear the air near it.

    When to replace your smoke alarms

    Smoke alarms do not last forever. Replace every alarm 10 years after the date it was made, even if it still beeps when you test it. The date of manufacture is printed on the back of the alarm. If you cannot find a date, the alarm is probably old enough to replace.

    Replace an alarm sooner if it fails a test even with a fresh battery. Combination smoke and carbon monoxide alarms may need to be replaced sooner than 10 years, so check the label or the manufacturer’s instructions.

    Keep them clean

    Dust and cobwebs can get inside an alarm and cause false alarms or slow it down. Once or twice a year, gently vacuum the outside of the alarm with a soft brush attachment, following the manufacturer’s instructions. Never paint over a smoke alarm or cover it with stickers or decorations.

    Have a plan for when the alarm goes off

    A smoke alarm only helps if everyone knows what to do when it sounds:

    • Get out, stay out, and call 911 from outside.
    • Know two ways out of every room, usually a door and a window.
    • Choose a meeting spot outside, like a mailbox or a neighbor’s tree.
    • Children and older adults may not wake up to the alarm. Decide ahead of time who will help them.
    • People who are deaf or hard of hearing can use special alarms with strobe lights and bed shakers.

    Practice your escape plan with the whole household at least twice a year.

    Quick smoke alarm checklist

    • An alarm in every bedroom, outside each sleeping area, and on every level
    • Test every alarm once a month
    • New batteries at least once a year (if they are replaceable)
    • Replace each alarm when it is 10 years old
    • Practice your escape plan twice a year

    It takes about ten minutes a month to keep your smoke alarms ready, and they protect your family every hour of the day. Take a look at the ceilings in your home today and make sure every alarm is where it should be and working.

  • How to Make Your Front Door Harder to Break Into

    How to Make Your Front Door Harder to Break Into

    Most burglars don’t pick locks or break windows. They look for the easiest way in, and very often that is the front door. The good news is that you don’t need an expensive alarm system to make your door much harder to get through. A few simple upgrades, most of them under $30, can turn a weak door into one that sends a burglar looking for an easier target.

    Here is what actually makes a difference, starting with the cheapest fixes.

    Why front doors fail

    When a front door gets forced open, the lock itself rarely breaks. What usually gives way is the wood around it. A strong kick near the lock puts all the force on the door frame, and the thin strip of wood that holds the strike plate splits. The door swings open with the deadbolt still extended.

    That means the goal is not just a better lock. The goal is to make the whole door, frame and hinges work together so the force of a kick has nowhere to go.

    1. Replace the short screws in the strike plate

    The strike plate is the metal plate on the door frame where the deadbolt slides in. In many homes it is held in place by screws that are only about half an inch to three-quarters of an inch long. Those screws only reach the thin trim of the frame.

    Take them out and replace them with 3-inch screws. Longer screws go through the frame and into the solid wood stud behind it. This one change costs a few dollars and takes about ten minutes, and it is one of the most effective things you can do.

    If you want to go a step further, buy a heavy-duty strike plate (sometimes called a reinforced or high-security strike plate). These are longer and have more screw holes, which spreads the force across more of the frame.

    2. Do the same with the hinges

    The hinge side of the door is just as important. If the hinges are held by short screws, a hard kick can tear them out of the frame. Replace at least one screw in each hinge with a 3-inch screw that reaches the stud.

    If your door opens outward and the hinge pins are visible from outside, consider security hinges or hinge pins that cannot be removed while the door is closed.

    3. Use a real deadbolt, and use it every time

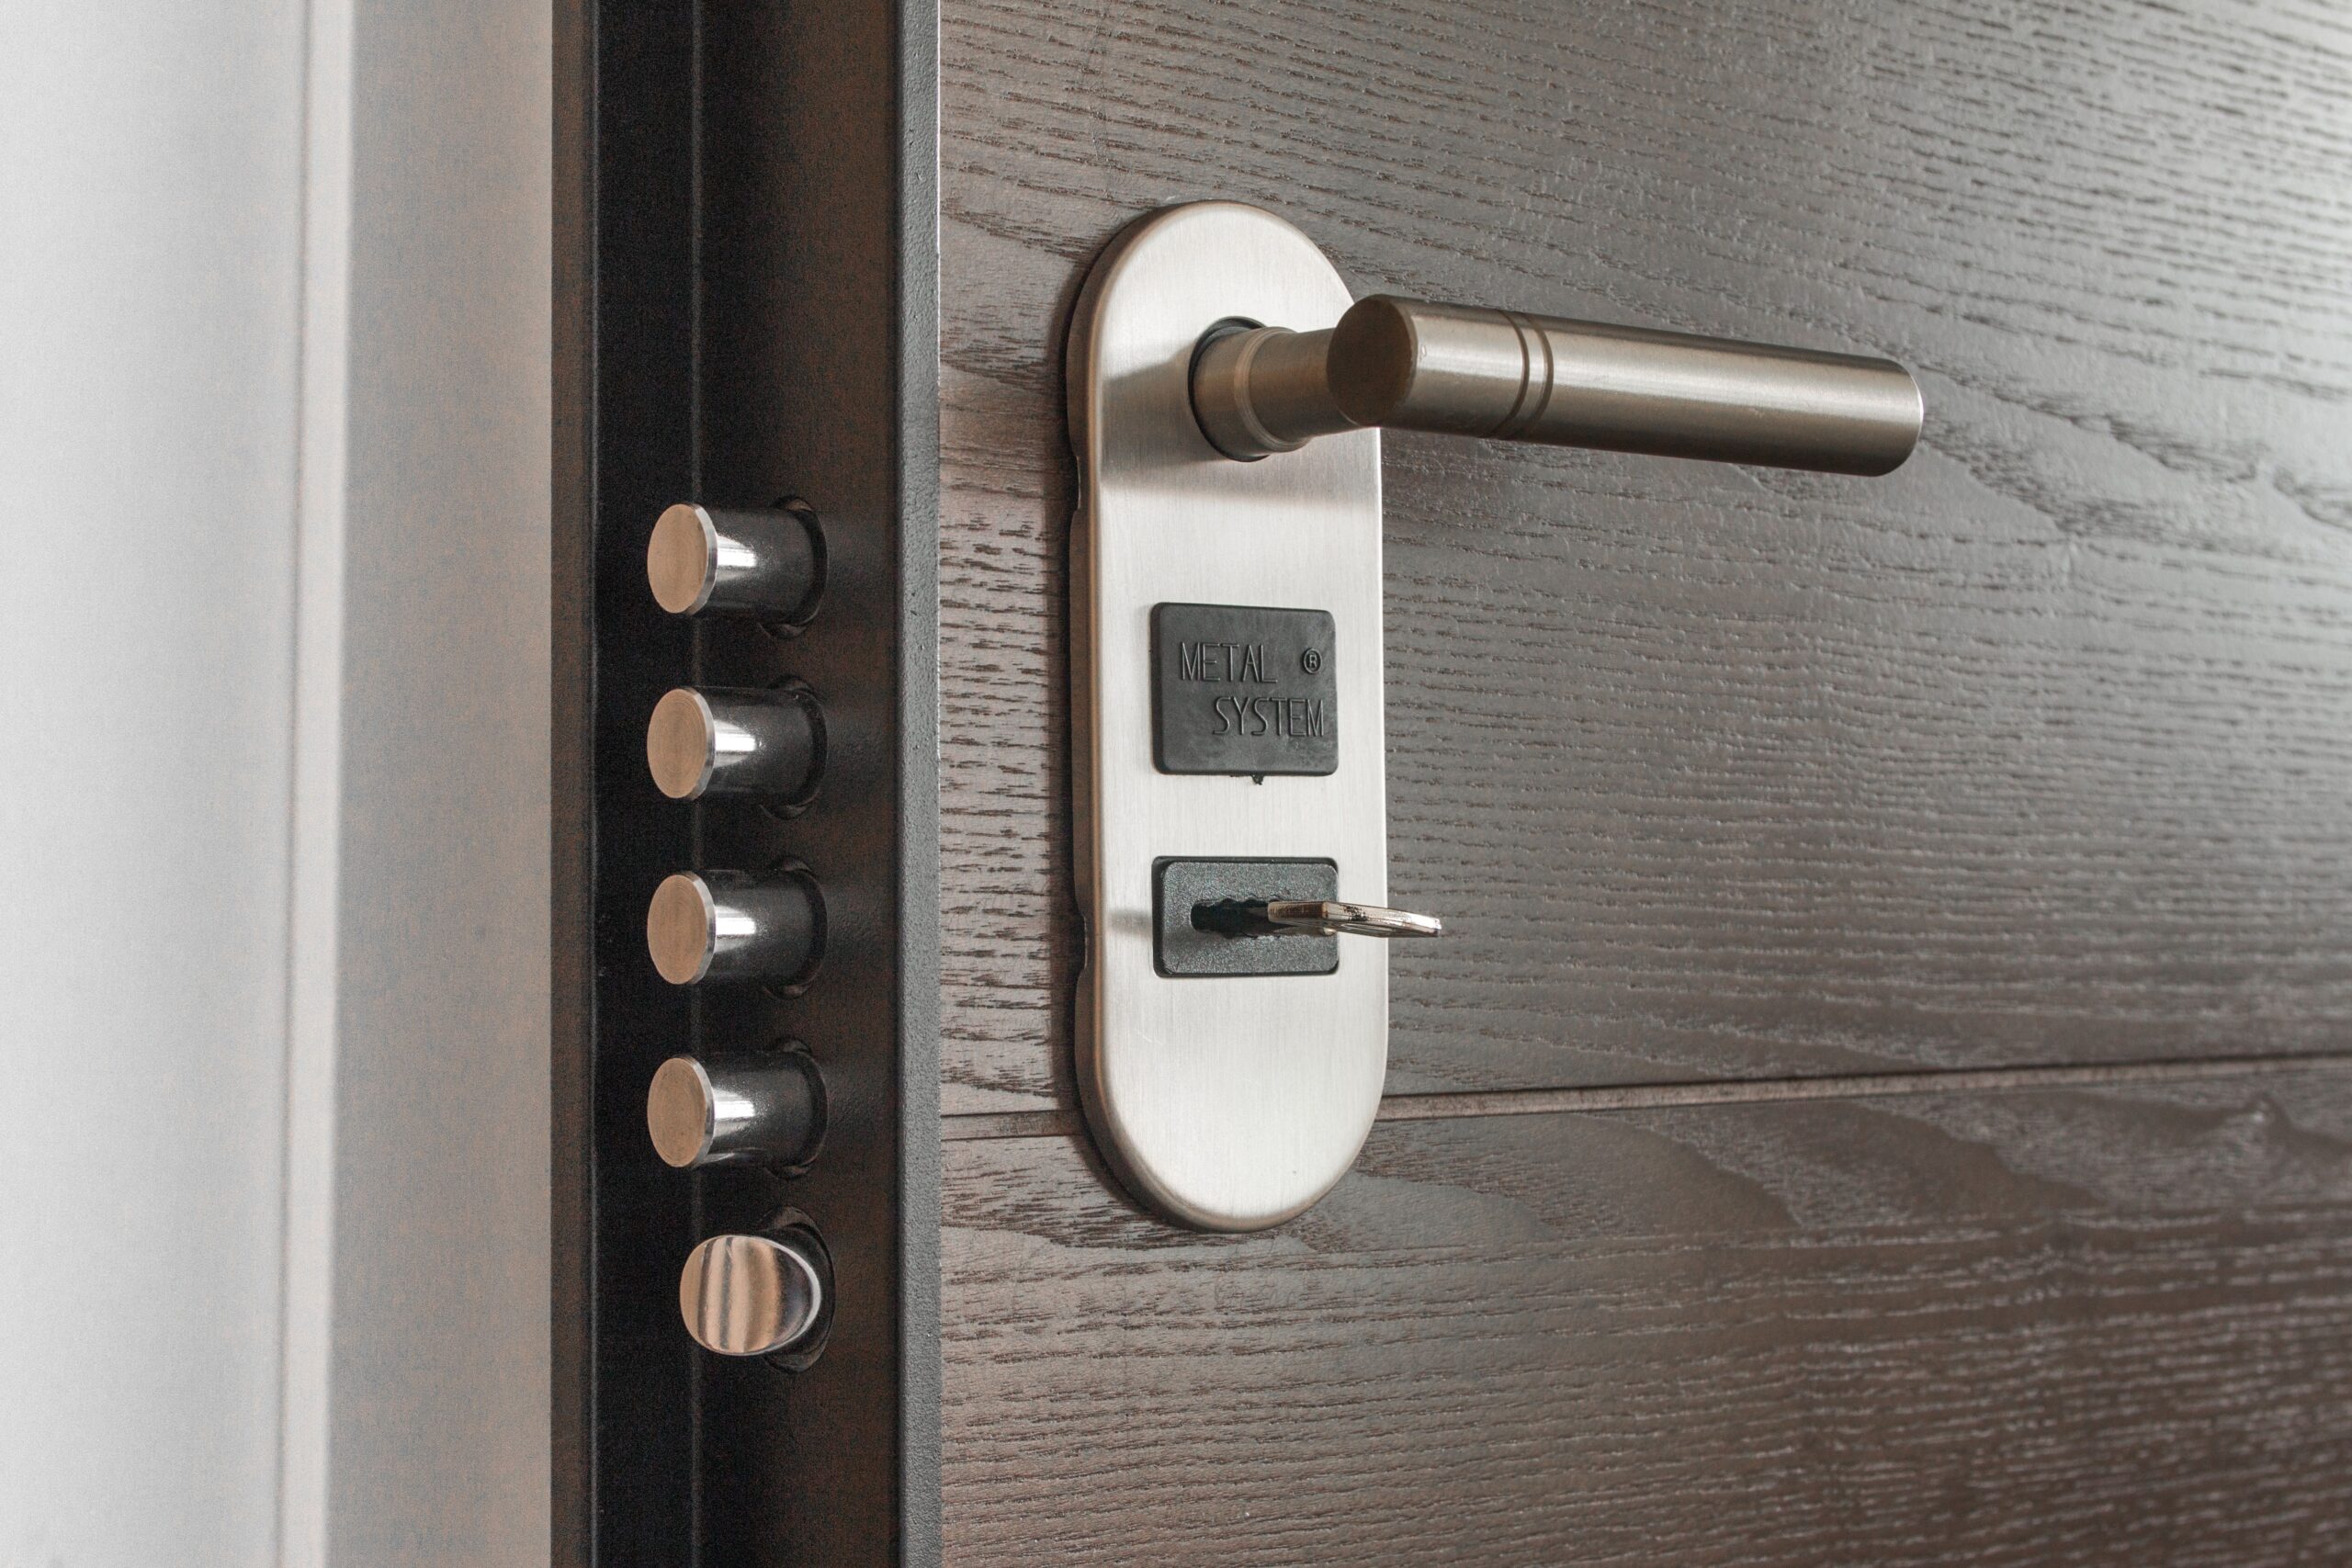
    A spring latch, the kind that locks when you push the button on the doorknob, is easy to slip with a thin card. It is not real protection. Every exterior door should have a deadbolt with a bolt that extends at least one inch into the frame.

    When you shop for one, look for a grade rating from ANSI/BHMA. Grade 1 is the strongest, Grade 2 is solid for most homes, and Grade 3 is the most basic.

    And the simplest rule of all: lock it. Many break-ins happen through doors that were simply left unlocked, even when people are home.

    4. Reinforce the door frame

    If you want the strongest protection, install a door frame reinforcement kit. These are long metal plates that cover the lock side of the frame, and sometimes the hinge side too. They spread the force of a kick along the whole length of the frame instead of one small spot.

    Most kits cost between $40 and $100 and can be installed with basic tools in an afternoon. If you rent, ask your landlord before installing one.

    5. Check the door itself

    A hollow-core door, the kind often used for inside rooms, can be broken through with a few hard kicks. Exterior doors should be solid wood, metal-clad or fiberglass. Knock on yours. If it sounds hollow and light, it may be worth replacing.

    If your door has glass panels near the lock, a burglar may break the glass and reach in to turn the deadbolt. Options include security film on the glass, or a double-cylinder deadbolt that needs a key on both sides. Be careful with that second option: it can make it harder to get out in a fire, and some local fire codes do not allow it. Check your local rules first.

    6. Make the area around the door visible

    Burglars prefer to work where no one can see them. Some simple ways to take that away:

    • Keep bushes and plants near the door trimmed low.
    • Install a bright porch light, or a motion-sensor light.
    • Keep the area clear of objects someone could hide behind.

    A video doorbell or a small camera aimed at the entry can also help. Even a visible camera tends to make someone think twice.

    7. Small habits that matter

    The hardware is only part of the protection. A few everyday habits close the gaps:

    • Don’t hide a spare key under the mat, in a flower pot or above the door frame. Those are the first places a burglar checks. Leave a spare with a trusted neighbor instead.
    • Don’t open the door for someone you don’t know. Talk through the door or use a doorbell camera.
    • When you move into a new home, have the locks rekeyed. You never know who still has a copy of the old keys.
    • Don’t leave packages sitting at the door for hours. They show that no one is home.

    A simple weekend plan

    If you want to do this step by step, here is an easy order:

    • Day one: replace the strike plate and hinge screws with 3-inch screws.
    • Day two: check your deadbolt and replace it if it is weak or loose.
    • Later: add a frame reinforcement kit and better lighting.

    None of these steps make a home impossible to break into, and no single product does. But each one makes your door slower and noisier to get through, and that is often enough to make a burglar move on.

    If you are planning to be away for a while, read our guide on protecting your home while you travel for the holidays.